Recently a lot of homeowners are interested (and actually have the time) to try a lot of DIY home improvement projects. Setting up a feature wall with wood panellings, assembling their own furniture, and hanging picture frames are some of the interesting DIY projects that we see a lot on social media.
So, you might wonder – what is the most important skill that you should have before you try out any DIY home improvement projects? Well, if we have to pick only ONE skill, it will be the skill to use a drill (a powered tool) to drill up holes on different kinds of materials.
What is a drill?
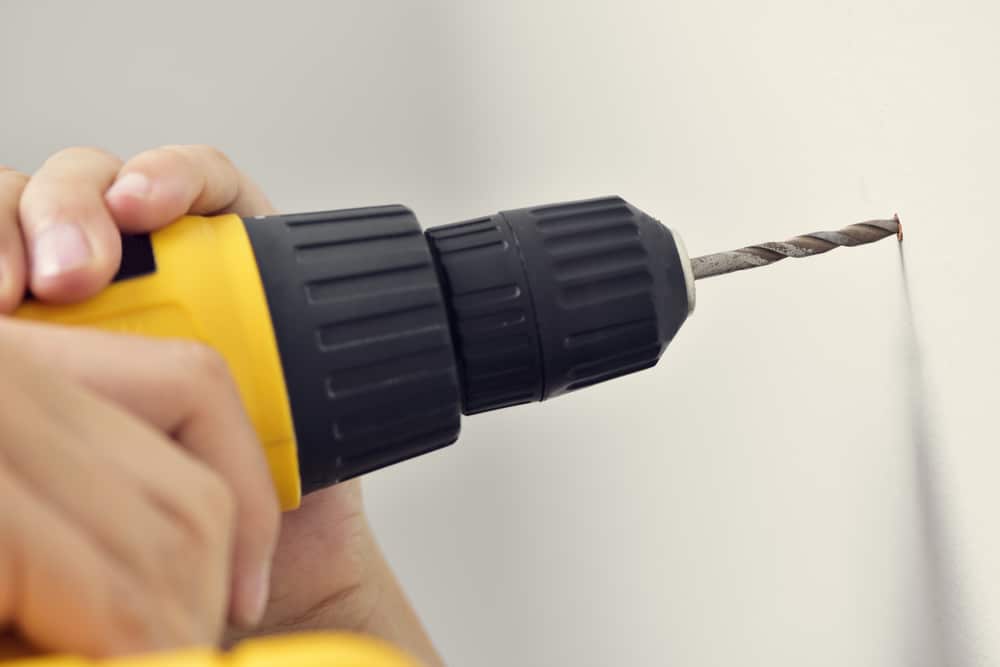
A drill is a piece of powered hand machinery used to make holes and drive screws on surfaces and objects. The front part of a drill will be attached with drill bits (that come in different sizes) and it will spin clockwise or counterclockwise interchangeably to make holes on the surface. Additionally, driver bits can also be inserted on the drill to replace the job of a manual screwdriver. The power that works the drill can either come from a rechargeable battery (hence making it cordless) or corded where you need to plug it into the socket to make it run.
There is a lot of variation of powered drills available in the market, and each one of them has its own plus points. But the ones that are widely used at home and for DIYers are these two:
Power drill
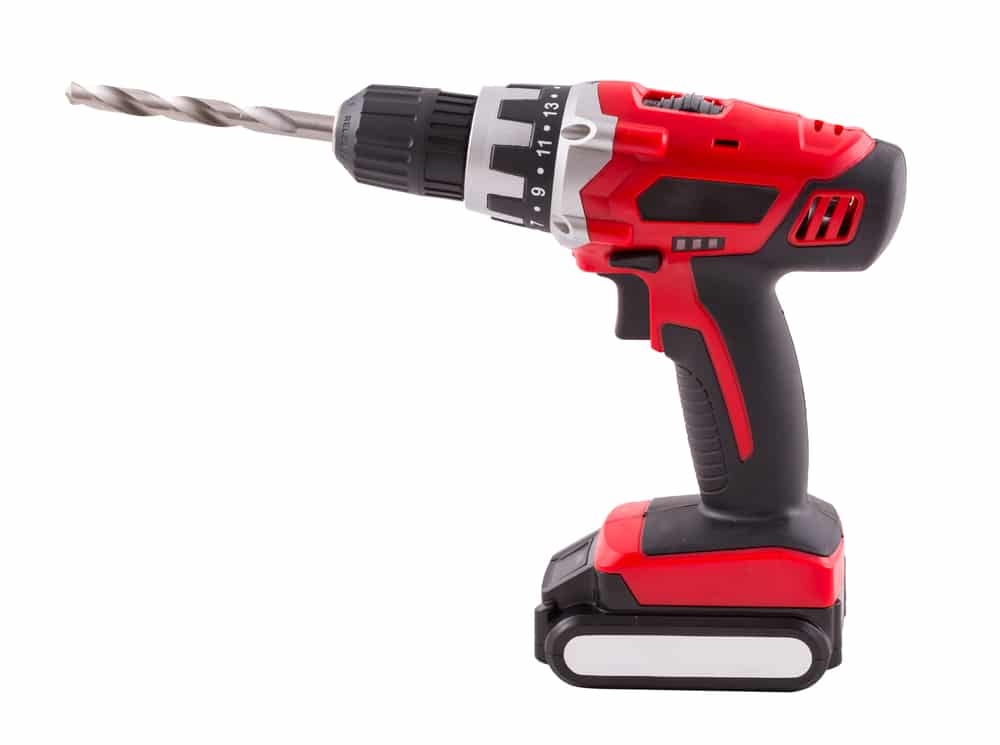
The power drill is widely used for regular work around the house like drilling on wood frames or driving screws on furniture. Power drills are usually cordless and come with either built-in batteries or removable rechargeable batteries.
A regular power drill always comes in a gun shape and is lightweight, making it easy to handle with just one hand. Power drills are not meant for heavy drilling.
Hammer drill
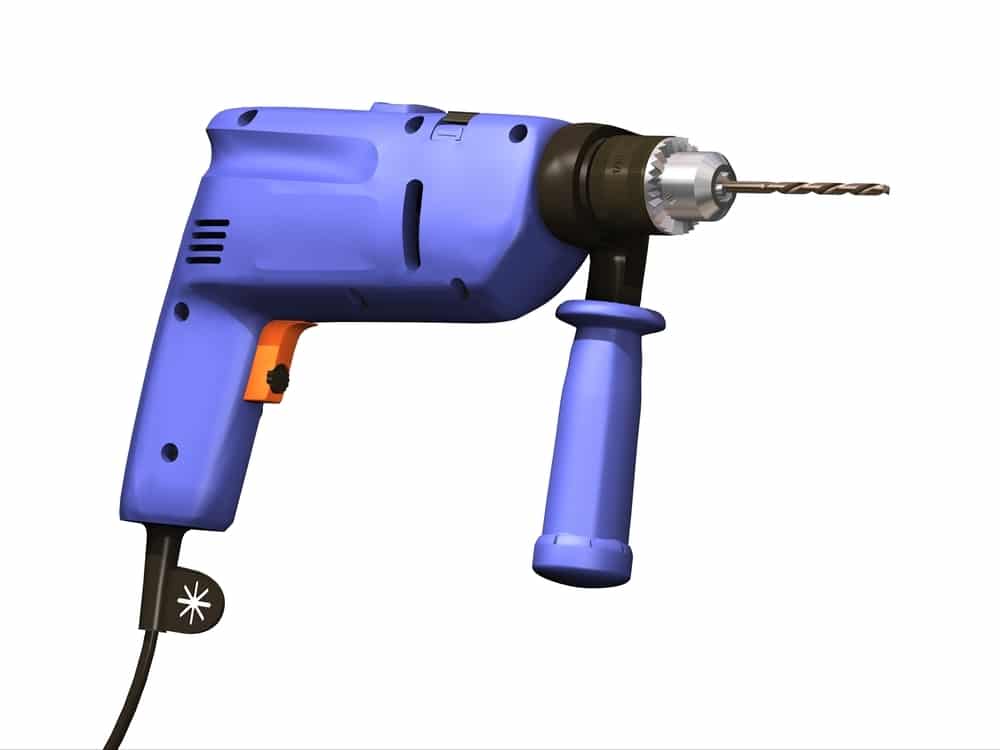
The hammer drill is the much stronger sibling where it has the same function as a power drill with an additional hammering function. The hammering mode when added with a little bit of pressure can break the particle and make holes on hardwood, drywall, bricks, masonry and even metal.
The hammer drills are usually corded as it is meant for heavy-duty work. But some brands sell cordless hammer drills in the market at much higher price points.
What do I need to have before I can start drilling?
Before you get all hyped up to start drilling the wall, let’s look at the other items that you need to grab from the hardware store.
Drill
First and foremost, you need to decide either to get a power drill for light to medium use, or a hammer drill for more heavy-duty projects. Usually, houses in Malaysia are built with bricks and mortar, unlike houses in western countries that often use wood and drywall.
If you are looking at the possibility of drilling the wall to hang frames, lighting fixtures or floating shelves, you need a powerful drill that can actually penetrate into the material.
Drill bits
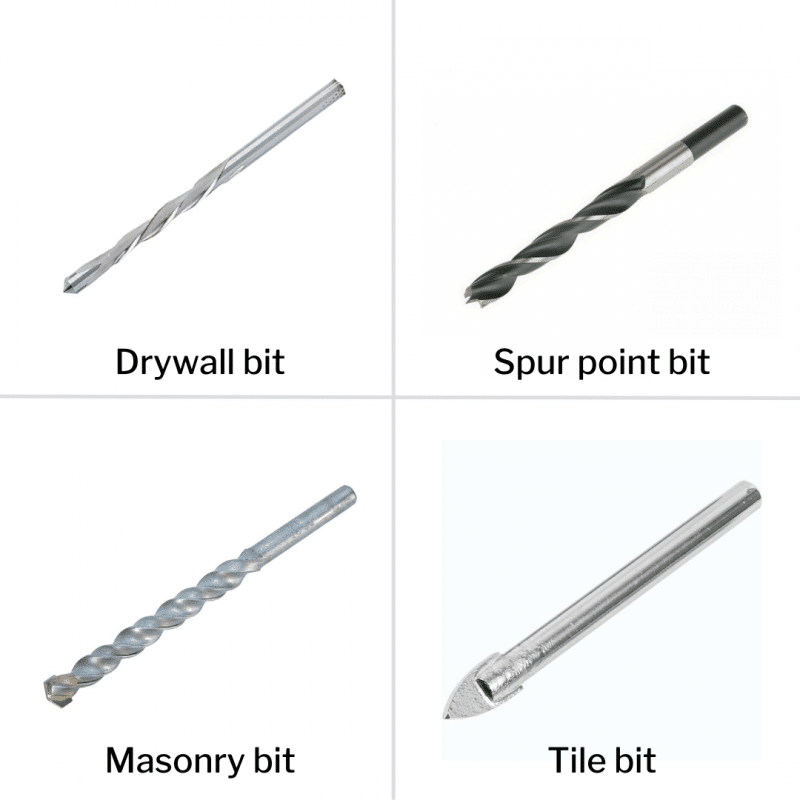
Drill bits are the cutting tool that you need to attach on the front part of the drill to make the holes on the work surface. The drill bits come in various sizes (in diameter) to make different sizes of holes, according to the size of the screw that you need to use. Besides that, drill bits also have different variations for different types of material. For example:
- Drywall bit is for materials that are smooth and hollow such as plasterboards, gypsum walls and drywalls. Since these materials are not that hard, you can use any universal bit too.
- Masonry bit is made of tungsten carbide and provides better penetration against harder materials such as concrete, stones and bricks.
- Spur point bit has a very sharp point that ensures clean and straight entry when drilling into wood.
- Tile bit can be recognised with its spear-shaped tip that is specially made to drill on strong but fragile surfaces like tiles, ceramic and glass. The spear-shaped bit helps you to carefully drill a more accurate hole.
Drill bits are usually included in the drill set and can be bought separately too. If you browse the drill bit shelf at the hardware store, you will come to notice so many other drill bits available in the market. It is because, over time, other special bits were created for more specific tasks.
As mentioned earlier, the drill can also be attached with driver bits to drive the screws into the wall or furniture. Drivers bits too come in various options that are suitable for Phillips and flat-head screws of different sizes.
Wall plugs
A wall plug is a filler that you insert into the drilled holes before you drive the screws in. The purpose of the wall plugs is to give a better grip to the screws, so they can securely hold the weight of the item especially on brittle walls.
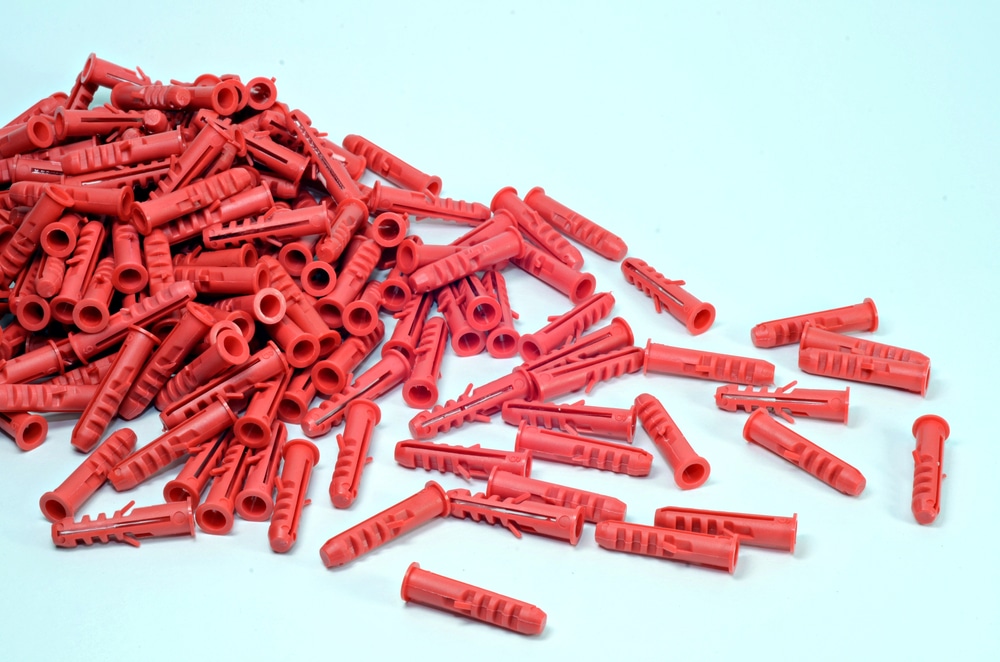
For light to medium weight items, plastic wall plugs should be sufficient. But if the item is heavy you may need to use a metal wall plug instead. So, before you drive the screw into the wall, make sure you have the wall plugs according to the size of the screws ready too.
What do I need to check before I can start drilling?
Besides getting a power tool (power drill or hammer drill) and the accessories ready, remember to look at the safety aspects as well. Here are some things that you need to ensure before, during and after you finish working with the drill.
1. Personal safety
Wear fitted clothes, use gloves if you have sweaty palms, put on a mask and safety goggles. Wearing the right clothes and gear will help you move freer and actually feel more comfortable throughout the process.
2. Assess the area to be drilled
Once you have decided where you want to place the item that needs to be drilled on the wall, you need to assess the wall where you want to drill. Ensure that you don’t accidentally drill on any electrical wires which usually run near the power sockets, switches and wall lightings. If you are drilling the bathroom wall to hang any bathroom accessories, make sure that there’s no pipeline concealed in the wall as well.
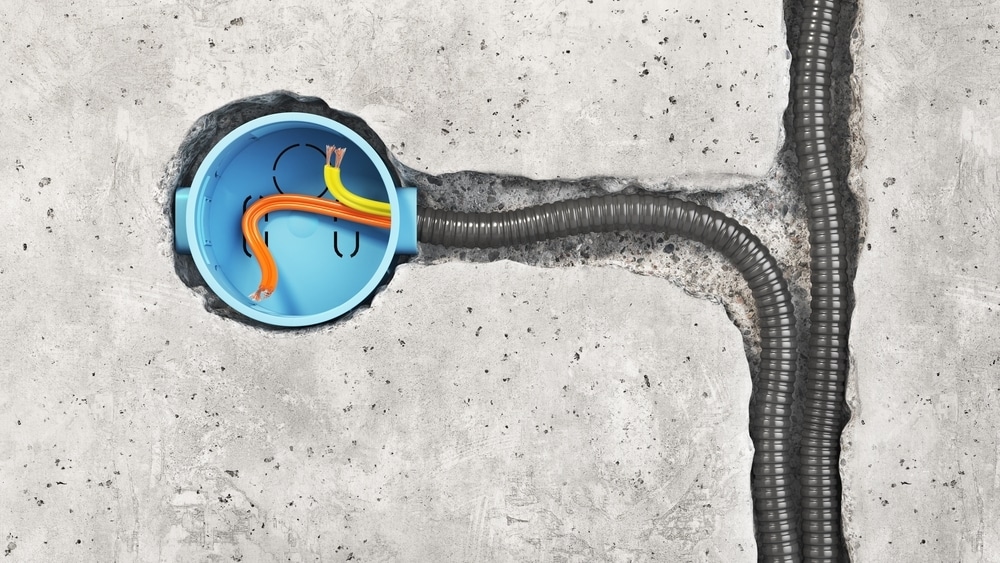
Also, be mindful of what is on the other side of the wall as well. Longer screws might penetrate and damage any concealed wiring and piping on the other side. Alternatively, you can use a stud sensor which is a very handy electrical tool that can locate any pipes, wiring or studs hidden in the wall.
3. Identify the surface material
You need to know the surface material that you are drilling into as different materials would require a different type of drill bit.
4. Measure and mark
Use a measuring tape and leveller to accurately mark where you want the hole to be. Mark an X with a pencil or marker directly on the surface or alternatively, paste a paper tape on the identified location and put the mark on the tape instead. After drilling, just remove the tape.
5. Switch off the plug
Every time you want to change the drill bit or finish drilling, remember to switch off the plug. Don’t take any chances because even the slightest press of the trigger will run the drill and can lead to accidents. Most importantly, don’t leave the power tool unattended and keep it away immediately after use.
How do I start drilling?
Once you have covered all the preliminary do’s and don’ts, it is time to power up the drill. And here’s what you need to do:
1. Attach the right drill bit
After you have identified the surface material, find the drill bit that is meant for it. Also, make sure the drill bit size is suitable with the screw that you will use later. Then, attach the bit onto the front part of your drill.
2. Mark the depth of the hole
Usually, a hammer drill will come with a removable marker that looks like a ruler. You can set the desired depth of the hole on the marker. Once the marker touches the wall when you drill, that is the signal for you to stop adding pressure and withdraw. Some other options are, you can put a mark on the drill bit itself by using a marker or use paper tape to mark how deep the drill bit should go in.
3. Hold the drill at 90-degree and drill away!
To start, drill a “pilot hole” to determine your marked spot and as a guiding point to easily drill further in. For this, you will need to use a bit with a smaller width than your screw’s shank (refer to image below).

Stand steady, hold the drill and firmly position the bit to the wall at a 90-degree angle on the marked point. Then, put your finger on the trigger and press it slowly.
To keep a clean 90-degree angle while drilling into your wall, you could create an L-shaped jig using wood scrape pieces (as shown below). This will hold the bit perpendicular while boring the hole.
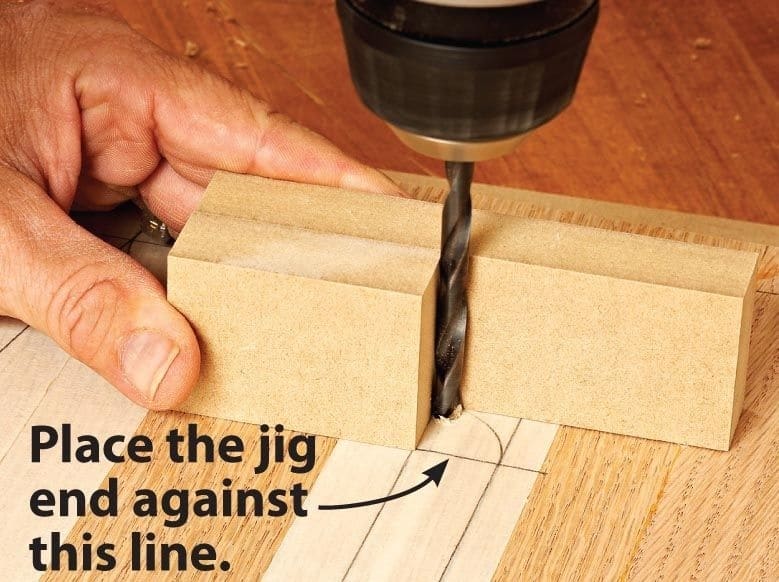
Alternatively, another trick is by using an old CD. Stick it to the wall with the hole lining up to the marked point you will be drilling. From the reflection, you can see the straight angle at which your brill bit is positioned.
If you are drilling on a brick wall, you might need to add some pressure. Once the bit has penetrated into the wall, continue pressing the trigger and add steady pressure until you get the desired depth. Lastly, slowly withdraw the bit from the hole that you just drilled.
4. Insert the wall plug
Grab the wall plug that is suitable with the hole and screw size, then lightly hammer it into the wall.
5. Drive the screws in
Depending on what the hole is for, drive in the screw accordingly. If you want to hang a picture frame, wall clock, or a vanity mirror, leave around 5mm of screw jutting out from the wall to hang the items. On the other hand, if you are fixing furniture to the wall, make sure that you drive the screws all the way in so it is properly secured.
Is there anything else that I should be aware of?
Well, yes. During the first couple of times drilling, you might come across some common beginner hiccups.
1. The drill bit is not penetrating
The most common problem for beginners is that the drill bit could not penetrate into the surface even after you put in a lot of pressure. This might be due to the wrong drill bit, or the bit is blunt. Make a quick stop at the hardware store and get a suitable drill bit for the surface that you are going to drill on.
2. Some parts of the wall is harder to penetrate
You may also experience some part of the wall harder to drill although the earlier hole is just a few centimetres away. This might happen due to the existence of other materials concealed in the wall like metal that are used to protect wiring and pipelines. If you are confident and still want to follow through, change drill bits as deemed necessary. Or else, just abandon the hole, plaster it back, and think of an alternative location to put your furniture or item.

3. Cordless drill spins too slow
This is usually due to depleting batteries. So remember to charge your cordless drill beforehand. There’s nothing more frustrating than having a drill that is dying out and spins just as slow as a manual screwdriver. If you are using a corded drill, have a spare extension cord on standby. Even if you can reach the spot to drill, it is best and safer to keep the cord loose at all times.
Better safe than sorry
Sometimes a task that seems easy could be more complicated than we think, so it’s better to get a highly experienced handyman to get the job done. Especially if you need it urgently, and have limited resources to do it yourself. Enjoy fast booking, reliable service pros and transparent pricing when you hire a handyman with Recommend.my!


ok thanks
but you didn’t explain how to hold the drill in 90 degrees to the wall you only assume it is correct
do you use eye level stuck to the drill or you can suggest better way
I would appreciate your help
best regards
Hi Coby, thanks for pointing this out!
It’s not easy to keep a 90-degree angle while freehand drilling but we’d suggest make-shifting an L-shaped jig or using the CD trick. We’ve updated the article with these details too. Hope it helps and let us know if you have any more questions!